Authors


Introduction
In this guide you will find examples of burst for each job. This is not meant to be the ONLY burst you do and will not be covering more advanced cases, including Adrenaline (Limit Break) actions, but it is meant as a starting point for you to practice at the Wolves Den on a dummy.
During actual matches please be sure to adjust the burst as necessary to secure the kill. This comes with experience, so always think critically.
This is a living document and it will be updated as the community grows and the meta changes.
Be sure to take the time to read each ability so that you can understand why it’s being used.
Do stop by the Revival PvP Discord mentoring section if you have any questions and want to learn further!
Keep in mind that some bursts require gauge to be built up and many abilities are different from their PvE counterparts.
Why Burst Is Important
Healing potency via healing spells, abilities and Med Kits (potions) are extremely strong and can counter a lot of incoming damage.
In order to be able to effectively secure kills it’s necessary for all players to use their strongest abilities (burst) at the same time especially during:
- buffs such as Phantom Dart / Feint
- debuffs like Dia / Inner Chaos
- crowd control like Stun on the burst target and Sleep on healers
Bursts are coordinated in a way to maximise the damage output in the shortest amount of time.
 Caster Burst
 Black Mage
BLM’s main strength comes in the pressure it can create while safely free casting Fire IV.
All of the spells below are the same potency (2,400) but BLM burst is about using instant-cast spells during Phantom Dart’s duration.
Black Mage Burst Example
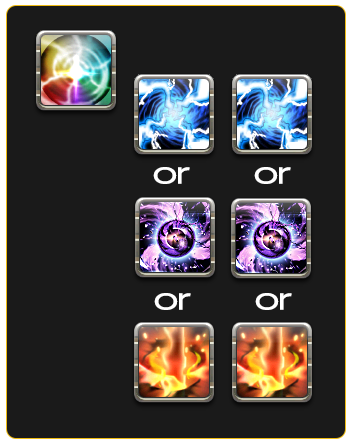
 Phantom Dart
 Thunder III OR
  Xenoglossy OR
  Fire IV
- Thunder III OR Xenoglossy OR Fire IV
 Summoner
SMN burst consists of maximising damage during each “Trance” - Dreadwyrm Trance and Firebird Trance, each with a 30 second cooldown.
Each trance requires 2 Aetherflow - each Energy Drain usage rewards you with 1 Aetherflow.
Keep in mind that Painflare is also an AoE 2 second stun.
Summoner Burst Dreadwyrm Trance Example
 Dreadwyrm Trance
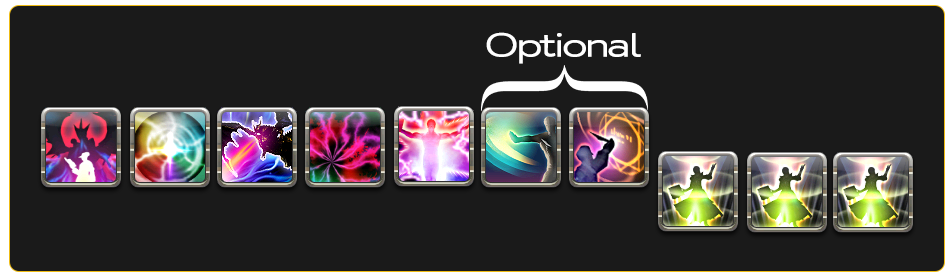
- Phantom Dart
 Deathflare
 Tri-disaster
 Fester
 Wither (optional)
 Painflare (optional)
 Ruin III
- Ruin III
- Ruin III
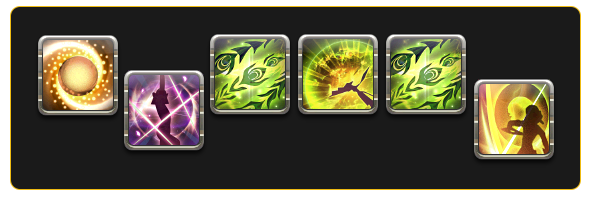
Summoner Burst Firebird Trance Example
 Firebird Trance
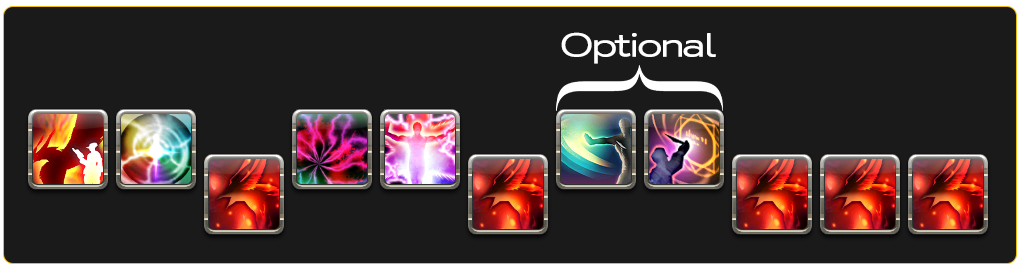
- Phantom Dart
 Fountain of Fire + Tri-disaster + Fester
- Fountain of Fire + Wither + Painflare
- Fountain of Fire
- Fountain of Fire
- Fountain of Fire
 Red Mage
RDM burst is all about the finishers being used with oGCD abilities and is extremely flexible.
Your melee combo is NOT your burst, it’s a way to build your finishers - Verholy/flare & Scorch.
Be mindful of the enemy when going into melee range to execute your melee combo.
Keep in mind that Corps-a-corps heavies the target and Displacement binds the target.
Red Mage Burst Example
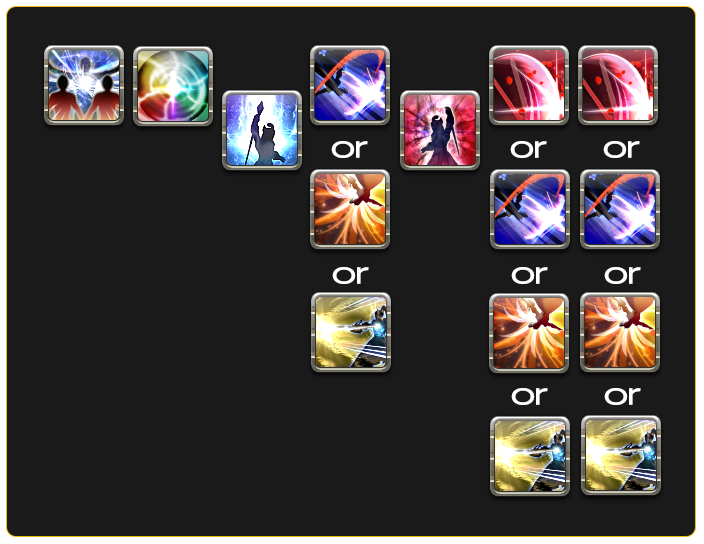
 Embolden
- Phantom Dart

 Verholy/Verflare
 Displacement OR
  Engagement OR
  Corps-a-corps
 Scorch
 Enchanted Reprise OR Displacement OR Engagement OR Corps-a-corps
- Enchanted Reprise OR Displacement OR Engagement OR Corps-a-corps
 Melee Burst
 Dragoon
DRG excels at pressuring the enemy with a burst every ~7 - ~15 seconds.
DRG can burst at a moderately safe distance too due to the huge range on all of their attacks.
Piercing Talon can do as much damage as your 1-2-3-4 combo finishers - don’t forget that while deciding what GCD to use.

Dragoon Burst Example
 Life Surge (Optional)
 Stardiver (Optional)
 Fang and Claw OR
  Piercing Talon
 Nastrond OR
  Geirskogul
 High Jump OR
  Smite OR
  Mirage Dive
 Wheeling Thrust OR Piercing Talon
 Monk
Monk
MNK burst is all about big damage oGCDs.
This burst order lands your damage in a short timeframe while also buffing SSS under RoF.
Effective use of Brotherhood and Axe Kick will help you build burst quickly - being MNK is no excuse for slow bursts.
MNK burst is organised with oGCD to start due to the long animation of Tornado Kick
Monk Burst Example
 Feint (Optional)
 Riddle of Fire
 Tornado Kick
 The Forbidden Chakra
 Six-sided Star + Smite
 Ninja
Ninja
NIN is about doing as much damage so Assassinate and Smite can execute the target. Build to at least 60 Ninki.
Remember that Assassinate can deal up to 3k potency in damage as the target’s HP decreases AND it resets on an assist or kill.
If you can safely get a Trick Attack off without losing uptime be sure to do so for the 10% damage buff.
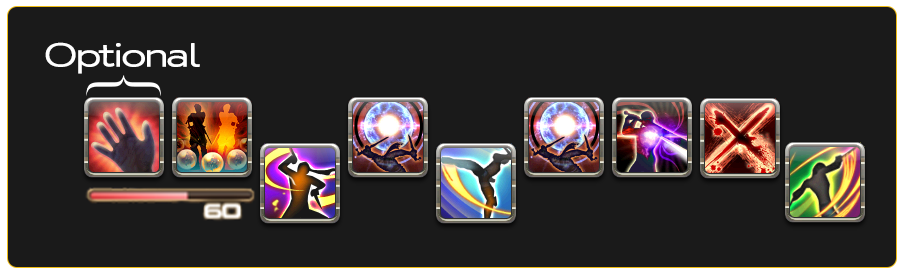
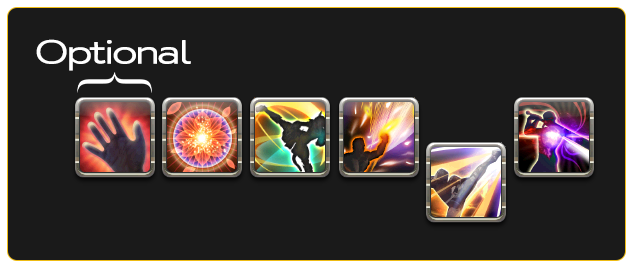
Ninja Burst Example
- Feint (Optional)
 Bunshin
 Spinning Edge +
  Bhavacakra
 Gust Slash + Bhavacakra + Smite +
  Assassinate
 Aeolian Edge
 Samurai
SAM burst is not simply Midare > Kaeshi: Setsugekka.
Be sure not to overcap on Kenki and use Shinten for 1,200 potency of damage.
In approximately the time it takes to cast 1 Midare you can get 2 Shinten for only 200 less potency. Keep this in mind when planning your bursts.
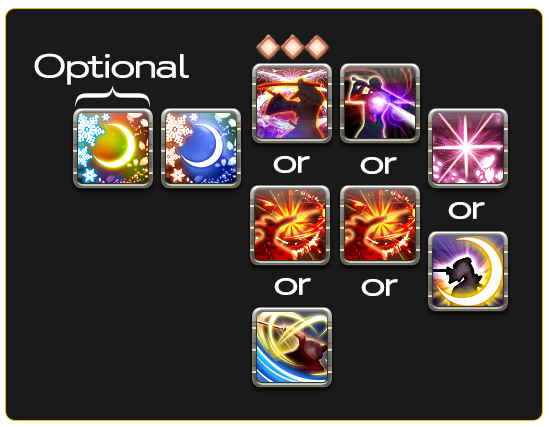
Samurai Burst Example
 Midare Setsugekka (Optional)
 Kaeshi: Setsugekka
 Shoha (3 Meditation stacks) OR
  Hissatsu: Shinten OR
  Hissatsu: Soten
- Smite OR Hissatsu: Shinten
 Kasha OR
  Gekko
Gekko
 Physical Ranged Burst
 Bard
Bard
BRD burst is one of the fastest to execute.
Be sure to take advantage of the simpler burst to effectively use your other abilities such as the “grazes” for crowd control.
When under the effect of Army’s Paeon the burst is the same - just without Pitch Perfect.
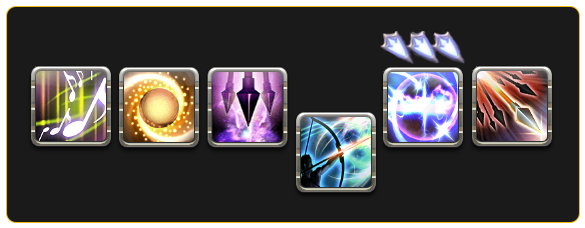
Bard Burst Example
 The Wanderer’s Minuet
 Concentrate
 Shadowbite
 Apex Arrow +
  Pitch Perfect (3 Repertoire stacks) +
  Sidewinder
 Dancer
DNC burst isn’t as strong as other jobs but it buffs you and your Dance Partner.
Saber Dance increases damage dealt by you and your Dance Partner by 10%, Fan Dance 3 reduces damage taken by you and your Dance Partner by 10%.
Be sure to keep rolling your GCD while executing the burst below - remember that using En Avant will buff your next GCD ability.
If your ping is too high be sure to remove one oGCD between the GCD usage.
Dancer Burst Example
- Concentrate
 Saber Dance +
  Fan Dance +
  Fan Dance III + Fan Dance
 Fountainfall
 Machinist
MCH burst is about maximising damage done during Wildfire.
Be careful when going in to apply Bio Blaster - the enemy can easily turn on you and lock you down.
Triple weaving is ok in PvP so don’t be afraid to do it! If ping is too high be sure to remove 1 Ricochet from each “volley”.
Concentrate and Drill is a 2 button combo with extremely high potency.

Machinist Burst Example
 Bioblaster + Concentrate +
  Wildfire
 Drill +
  Gauss Round +
  Ricochet + Gauss Round
 Air Anchor + Gauss Round + Ricochet +
  Blank
Blank Heated Clean Shot
Change Log
- 13/09/2021: Release of this page